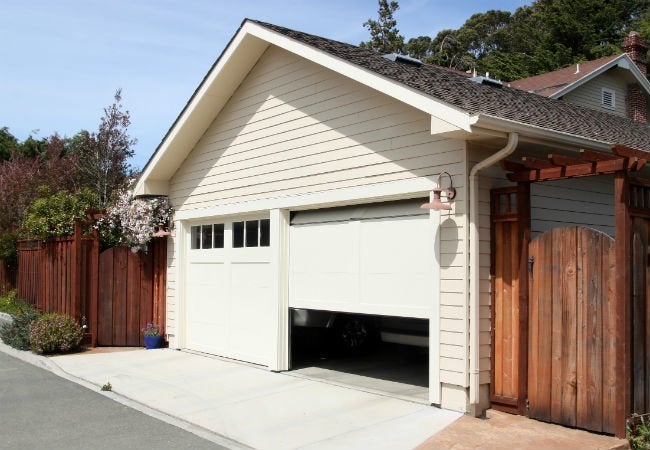
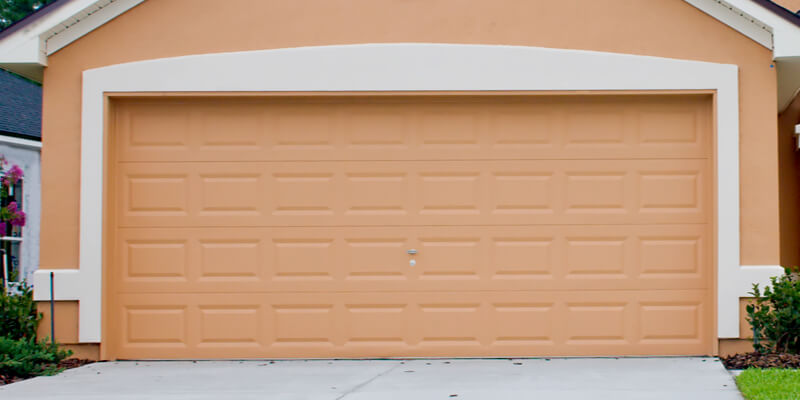
GUIDE TO REPAIR BOTTOM GARAGE DOOR PANEL

You require a garage door that is both secure and completely functional. A garage door is both ornamental and functional since it protects against inclement weather and burglars. Damage to your garage door not only detracts from its aesthetic but may also jeopardize its functionality and present safety concerns. While the damage may appear slight, its influence on garage door performance may be significant. As a result, garage door panel repair is critical to repairing the damage as soon as feasible.

Because of its location, the component at the bottom of the garage door, known as the bottom panel, is the most vulnerable. Because it is close to the ground, this part receives the most brush-ups and has greater interaction with precipitation and pests like termites.

When Should I Replace/Repair a Garage Door Bottom Panel?

It is natural for a garage door’s health to decline with time – it will not remain like new forever. For example, after a strong storm, you may realise that heavy debris or hailstones have damaged your garage door. It may even be destroyed accidently by children playing football or engaging in other activities nearby. Even if this occurs, do not panic; it does not necessitate the purchase of a new garage door. Typically, just one or a few panels must be changed.

A garage door panel is not prohibitively costly, so you do not need to be concerned about it having a significant influence on your household budget.

However, putting it off for too long might exacerbate the condition significantly. A broken door, for example, exerts a lot of strain on the entire door opener, and the entire system may become misaligned or jammed. Replace the broken panel as soon as possible if you want your garage door to perform correctly.

What Is Required For The Repair?

You do not need to hire a professional to replace the bottom panel of your garage door. It is a simple technique that can be completed by anybody with basic DIY abilities.

You may save money on door repairs by investing in a high-quality panel that matches the rest of the structure and lasts as long as feasible in every weather condition.

So, after you have the replacement panel and are ready to begin the repair, make the following preparations:

  • grips for vises;
  • tape to measure;
  • 2 hoists
  • Impactful wrench

Step-by-Step Replacement of a Garage Door Bottom Panel

PREPARATIONS

  • First, determine the size of your garage door. Remember to measure not just the height and breadth, but also the depth. Check that the measurements you took on your new portion are consistent with the ones you took on the previous one. It is also advisable to check if the form is correct.
  • Remember to unhook your garage door opener’s power cable for safety reasons. Aside from that, you should remove the door opener.
  • Attach the hoist to the garage door track’s top.
  • Then, connect the other end to the hinge situated second from the bottom.
  • Locate the cable that connects the bottom bracket and vise hold it to the drum.
  • Now you’ll need to raise the garage door about 4 inches, but first make sure your hoist is snug and secure.
  • Repeat steps 3 and 4 on the other side of the garage door.

REMOVAL OF GARAGE DOOR BOTTOM SECTION

  • Ensure that the bottom panels of the broken garage door that you are removing are supported by a 2×4 or something substantial. It will not fall to the ground in this manner, which may be hazardous.
  • Using an impact wrench, remove the hinge nuts that connect the bottom garage door part  repair to the middle one. Begin from the exterior and work your way toward the middle hinges.
  • If any bolts cannot be removed with a vise grip, break them and place the old bottom garage door component on a sawhorse.

Installation of a New Garage Door Panel

  • Place the new garage door bottom panel on the floor slightly beneath the remaining door.
  • Attach both sides to the tracks using the vise grip. Next, position the new garage door part so that it is parallel to the floor.
  • Drill the window if necessary to accommodate bottom brackets, and then install bolts on both sides.
  • Flange nuts should be installed on the bolts.
  • Place the garage door panel on the floor and connect the cable to the bottom bracket.
  • Insert the rollers into the tracks and bottom brackets, then vise-grip the track to the upper portion.
  • Approach this area of the garage door from either side and secure the cable to the bottom bracket.
  • Put the roller in the bracket.
  • Secure the track and use the hoists to lower the door on the bottom portion to prevent the new section from collapsing.
  • Check that the hinges are securely attached to the bottom area of your garage before removing the clamps, vise grips, and hoists.
  • Replace the opener and plug it back in. Congratulations for completing a garage door replacement on your own!

In conclusion

Don’t leave a damaged panel; your car or residence should always be fully covered from inclement weather, such as wind or rain, as well as theft or vandalism.

It is possible that you may find that you need to replace its bottom piece that has direct touch with the floor at some time. Such a shift may not necessitate expert assistance; nonetheless, if in doubt, always return to a professional service like Premiumdline.

Leave a Reply

CONTACT US

BRANDS

SERVICES

CONTACT US

Copyright © 2022 Premium Garage Door | Privacy Policy

Leave a Reply